
This project started when I was looking for an empty cabinet to house a pair of unused 12” drivers that were lying around in my workshop. Little did I know what I was letting myself in for when I started
looking!
As a long time fan of WEM and Selmer equipment, (a hang-over from my schoolboy dreams of being a popstar back in the
1960's), an item on Ebay caught my eye. It was listed as an empty 2 x12” cabinet of unknown origin.
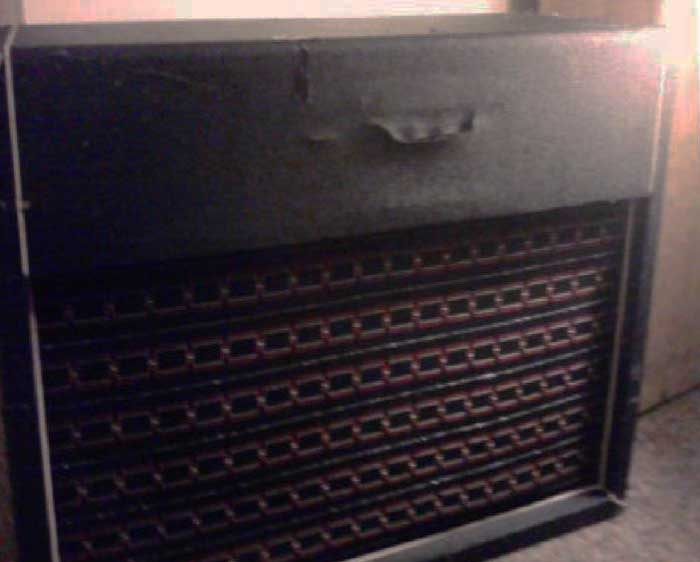
The above picture shows the cabinet as it was listed on the auction. What drew my attention was the iconic WEM grill cloth, although this was like no other WEM cabinet I had ever seen. The cabinet appeared to be in poor condition apart from the grill cloth so I decided to place a low bid with a view to keeping the WEM grill cloth for future use and then seeing what I can do with the empty cabinet. My bid turned out to be the highest and within a few days the cabinet arrived on my doorstep.
Closer inspection of the cabinet stirred my memory as the design looked vaguely familiar. However, there was a lot of work to do as the
Tolex was badly torn and in poor condition. Also, two of the bottom corners were badly damaged.
My first task was to unscrew and remove the front baffle so that I could access the grill cloth cloth and then, very carefully remove the WEM cloth. This was fitted with the usual staples around the edge and finished off with white piping, also stapled around the edge. Removing the WEM cloth gave me a shock because, revealed underneath was the unmistakable Selmer black/silver grill cloth. Further investigation, courtesy of the invaluable
Vintage Hofner Web Site revealed that the cabinet was, in fact, a Selmer All-Purpose Twin 30 Combo from the Selmer SV period which dates it around 1970.
I decided to try to restore the cabinet back as close as possible to its original condition. The following notes describe the steps that I went
through:
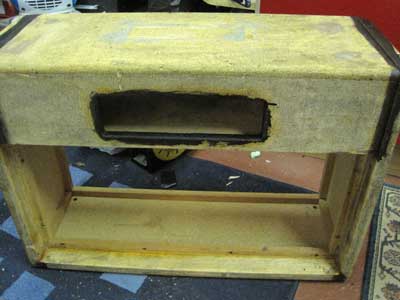
1) I had already removed the front baffle in order to access and remove the WEM grill cloth, so the next step was to completely strip the old worn out Tolex. This left me with basic chipboard cabinet as shown below:

One interesting point that you can see from the picture on the left is that there appears to have originally been an opening in the top of the cabinet. I assume this was part of the original design, intended to give ventilation to the valves, but it must have been filled in at the manufacturing stage as it was completely covered by the original Tolex.
2) I used dark wood stain around the amplifier opening and also along the grooves where the white trim is fitted. This was just in case there were any minor gaps when fitting the new tolex.
I also used wood filler to pad out and reshape the damaged corners.
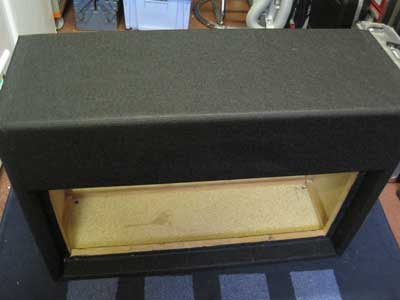
3) The next step was to apply replacement Tolex. It is impossible to match the very thin black Tolex used on the early Selmers but it is still possible to obtain black basket weave Tolex which was used on later Selmers and many other well know amps such as WEM and VOX. I used spray adhesive with some Copydex to glue the fiddly bits.
The pictures below show the front and back of the cabinet with the Tolex applied.

4) Next up was the fitting of replacement white piping, black leather handles and wheels. I used very thing gauge white wire for the piping.
The photo shows the cabinet with the piping, handles and wheels fitted.
5) I then started work on the front baffle. The Selmer grill cloth was very gently removed. Sadly, the grill cloth was not in the best condition – which is probably why a previous owner had fitted WEM cloth over the top of it. The Selmer cloth was complete but had frayed quite badly in a couple of places. I carefully rinsed and dried the cloth in order to remove as much of the 40 years of accumulated dirt as possible.
I decided to do what I had done on other previous projects in that I fitted a layer of strong black speaker mesh over the baffle frame. The mesh I used is designed for speaker cabinets and was used on early HH cabinets. It provides and firm protective layer over which the original Selmer cloth can be refitted. The photo shows the front baffle with the black mesh stapled into place.
The black mesh had to be stapled to the front of the baffle as stapling it to the edges would have made the baffle too tight to fit back into the cabinet. The Selmer cloth was stapled to the edges of the baffle and then a replacement length of white piping was applied. This type of piping is used on Marshall amps and so is still available to purchase and it is an exact match for the original Selmer piping.
The following picture shows the completed front baffle fixed back into the cabinet.
This is really the only part of the restoration which was disappointing as it was simply impossible to repair or replace the grill cloth so it still shows some signs of age. However, I have reinforced the frayed parts of the cloth by gluing it to the black back mesh so this should stop it from getting any worse.
You’ll probably also notice that I have fitted the Selmer logo to the front of the cabinet. This is an original Selmer logo which is authentic for this cabinet. I “pinched” it from another of my Selmer amps as it looks much more at home on this cabinet than it does on the other one.
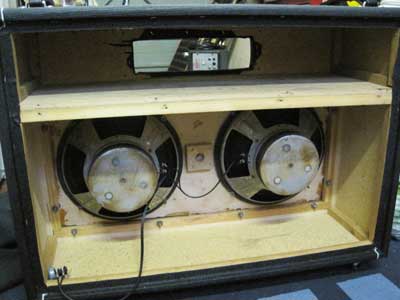
6) The final stages of the restoration of the cabinet was to fit the drivers that I had and to then refit the rear panels. The rear panels were recovered in matching tolex and I cut and fitted sections of wire mesh to fill the ventilation holes in the top panel section.
The photos show the drivers and back panels fitted.

7) The very last, but possibly most important, task of all, was to find and fit a suitable amplifier. AP30 amps are extremely rare and I’ve only ever seen one for sale and, sadly, I wasn’t able to purchase it. However, I was made aware of a Twin Bass 30 amplifier that was for sale. It was the type of amp that Selmer used for earlier piggy-back style Twin Lead 30 and Twin Bass 30 combos and dates from the Selmer Blue/Black period of the mid 1960s. It was a non-working amp but I decided to take a chance on buying it in the hope of getting it working.
The amp uses a GZ34 rectifier valve on the power supply, a single ECC83 on the pre-amp and a pair of EL506 valves to produce the power. On the amp I purchased, the GZ34 was missing and one of the fuse holders wasn’t working. Also, the on/off switch wasn’t working. So, I fitted a new GZ34 and replaced both fuse holders to ensure they matched. This brought the amp to life but there was quite a high level of mains hum and only a low level of output volume.
Sadly, I don’t have the knowledge, training or experience to delve into the electronics and, as you probably know, valve amps can use extremely high voltage levels. I therefore had to leave this to the experts and fortunately, Colin at a nearby music store in Fleet is just that.
He replaced the broken on/off switch, which also meant replacing the volume control to which it was attached. This wasn’t as simple as it sounds as the knob was well and truly rusted on and had to be sawed off. He also discovered a faulty resistor and capacitor which were both replaced and he found that the ancient OC71 transistor on the input stage was also not working as it should. Although OC71s can still be acquired, Colin recommended that a rebuild/redesign of the input stage before it goes into the ECC83 would produce much better results. And he was right. The amp is now loud and clear but goes into that sought after valve overdrive when wound up.
And so, with the amplifier now at 100% it was fitted into the cabinet and the project was complete. The first photo below shows the front fascia of the Twin Bass 30 amp section and the final photo shows the finished cab with the amp fitted.
I don’t think it’s the prettiest or best sounding combo that Selmer ever
made and the final cost of restoration has probably far exceeded the value of the finished item. However, it has been an interesting and enjoyable exercise and I take a certain amount of pride in bringing back to life a piece of music history which would otherwise have almost certainly ended up on the scrap heap.
To be honest, I’m not likely to make good use of the amp as my playing days were over years ago. So I may sell the amp on but it’s always difficult to part with something that you’ve put a lot of time and effort into so, who knows, I may still be playing a few chords through it and annoying the neighbours for a while yet.
The cabinet, amp and logo are all original Selmer parts. Other parts used were:
Black basket weave tolex – supplied by :- Mojo Musical Supply, North
Carlolina, USA
Black leather handles – supplied by :- Modulus Amplification, Kirriemuir, Scotland
Front baffle white edging/piping – supplied by :- SolSound
Cabinet white piping (wire) – supplied by :- Maplin Electronics
Wheels – Supplied by :- Wickes
Metal grill and various screws etc. – supplied by :- B&Q
Twin Bass 30 – supplied by Roger (a fellow WEM / Selmer enthusiast)
Valve amp expertise – Supplied by :- Colin at Kingfisher Music, who I would strongly recommend if you need an amp repaired.